How to Create a Dramatic Sky in Photoshop
I Guarantee I Can Teach You to Master Photoshop. Learn How: https://phlearn.com/aaronwillteachyou
Download the images in this episode here: https://phlearn.com/create-dramatic-sky-photoshop
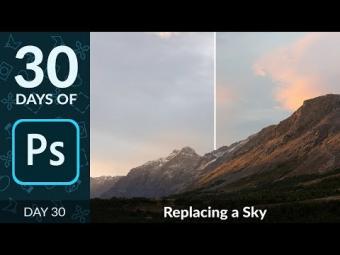
Learn how to enhance any sky by making it more dramatic in Photoshop!
How to Create a Selection from the Sky
The first step in creating a dramatic sky in Photoshop is to create a selection out of the sky, so only the sky is altered, not the rest of the image.
Use the Magic Wand Tool to select the sky. If the Magic Wand Tool doesn’t select enough area, bring the Tolerance higher, if it is selecting too much, lower the Tolerance. In this episode, we use a tolerance of about 30.
Chances are, your entire sky will not be selected with one click of the Magic Wand Tool. To add to an active selection, hold down the SHIFT Key and click another area. You will see a ‘+’ icon next to the Magic Wand Tool Cursor.
To remove an area from a selection, hold the ALT/OPTN key and click on a selected area. You will see a ‘-‘ icon next to the Magic Wand Tool Cursor.
The goal here is to select the entire sky without selecting areas like trees, people, or buildings.
Load the Selection in a Group Layer Mask
After creating a selection of the sky with the Magic Wand Tool, create a new layer and group the layer with itself by pressing CTRL/CMD+G. Then select the group and click on the layer mask icon. The active selection will be translated into a layer mask, revealing only the area that was once the selection.
The reason for making this Group Layer Mask is to restrict any layers inside the group to only show up over the sky. Any layer you place inside this group is defined by the layer mask of the group.
How to Add Dramatic Highlights and Shadows
They key to making skies more dramatic in Photoshop is to enhance the detail that is already present in the photo.
The techniques used in this tutorial will apply to any sky!
Let’s start by enhancing the dark areas of the sky. Create a new layer inside the group with the sky layer mask. Select black as the foreground color and use a large soft-edged brush to paint over the dark areas in the sky.
Next, open the Blending Options for the Layer by going to ‘Layer - Layer Style - Blending Options.' Change the blending mode to either ‘Multiply,' ‘Soft Light’ or ‘Overlay’.
At the bottom of the Blending Options Panel, there are two sliders labeled ‘Blend If,' we are going to use the ‘Underlying Layer’ Slider. Hold ALT/OPTN and click on the white arrow on the right-hand side of the slider and drag to the left. This will separate out the two end points and allow for a smoother transition. By sliding the arrows from the right side, you are telling Photoshop to make this layer invisible where the underlying layer is lighter.
To put it all together, the black you painted on the layer is now only visible in the darker areas of the sky, and it is making those areas even darker.
When it comes to adding highlights, simply do the exact opposite.
Paint white over the light areas in the sky, change the blending mode to Soft Light, Overlay, or Screen and click on the black arrows on the left-hand side of the Underlying Layer slider in the Blend If the screen and drag the arrow to the right.
To add some color to the sky, simply do the same thing, only paint with color instead of black and white!
VISIT PHLEARN.COM FOR MORE FREE TUTORIALS
https://phlearn.com
SUBSCRIBE NOW FOR MORE FREE TIPS AND TRICKS
http://www.youtube.com/subscription_center?add_user=phlearnllc
GET FREE TUTORIALS SENT TO YOUR EMAIL + DISCOUNTS ON OUR PRO TUTORIALS!
https://phlearn.com/mail
LET'S BE FRIENDS!
Instagram ► https://www.instagram.com/phlearn/
Facebook ► https://facebook.com/phlearn
Twitter ► https://twitter.com/phlearn
Google+ ► https://plus.google.com/116791098059215639405
Phlearn ► https://phlearn.com
Did you know there is a lot more to PHLEARN than YouTube? https://phlearn.com/more


YORUMLAR