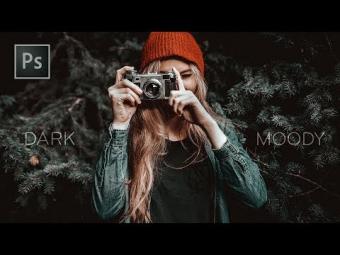
Blurred Panning Effect - Photoshop Tutorial [Photoshopdesire.com]
►Download PSD file: http://photoshopdesire.com/create-blurred-panning-effect-photoshop/
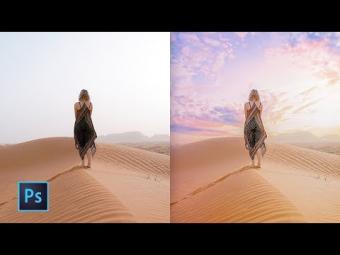
How To Emphasize motion by faking some blur using Adobe Photoshop tutorial.
Shooting for a blurred panning effect by moving with your subject to keep it sharp while the background goes fuzzy—isn’t easy.
It takes planning, practice, and often some cooperation from your subject.
Fortunately, motion blur, like many photographic effects, is possible to recreate with photoshop software.
In this Photoshop tutorial, we'll learn how to create a panning effect using Adobe Photoshop with the help of tools like Content-Aware Fill and Motion Blur filter.
First, as always, duplicate Background Layer.
we first need to draw a selection around the object or area we want to remove or replace.
take lasso tool and make a selection outline around the person. but there's no need to be surgically precise.
With the selection in place, go up to the Edit menu and choose the Fill command.
select Content Aware and click ok.
Photoshop can now examine the contents of the image and try to fill in the selected area with actual image detail, as if the subject we're removing never existed!
Content-Aware Fill was able to easily remove the person from the photo.
duplicate Background Layer again.
To fake the blur, you’ll need to select or mask the subject, move her to own separate layer, then blur the background.
The most complicated of this tutorial is making the selection.
i will use focus area tool to make selection.
Select the Focus Area Add Tool. simply click and paint over inside that missing area.
similarly select subtract tool to remove unwanted areas from a selection.
the edges of the selection are looking pretty rough and jagged. we clean it up, fine-tune it and make it even better with refine edge.
Now move the selection from Focus Area to the Refine Edge or select and mask tool.
To add more of the girl's hair to the selection, enable Smart Radius. Increase the size of the Radius by dragging the slider.
select refine edge brush and paint on area that needs further refinement.
Painting along the top of the hair.
Outputting my final selection as layer mask and click ok.
With the remove person layer selected, right mouse click and select Convert to Smart Object.
Then go to Filter - Blur - Motion Blur.
Set the Angle to zero, and play with the distance until it looks realistic.
Click OK.
That's it.
This video tutorial helps if you have question like:
How To Create a Motion Blur Effect.
How to Add a Realistic Motion Blur to backgrounds.
How to Mastering Panning Photographing Moving Subjects.
Capturing Dynamic Photos With a Panning Effect.
Faking motion in a Photograph.
How to Create Realistic Motion Blur with Masks.
How to Create Fake Motion Blur Effect.
Panning Capture Motion Blur and Keep your Subject in Focus.
►Check out all tutorial here : https://www.youtube.com/photoshopdesiretv/videos
Thanks for watching our free Tutorials! If you enjoyed our video be sure to subscribe to our channel to receive free new videos.
►SUBSCRIBE: https://goo.gl/d31fld
Don't forget to COMMENT, LIKE and SHARE, to get more :)
Follow US:
--------------------
►Offical Website: http://www.photoshopdesire.com
►FACEBOOK : http://www.facebook.com/PhotoShopDesire
►GOOGLE+ : https://plus.google.com/+photoshopdesiretv
►Twitter : https://twitter.com/PSDesire
►Instagram: https://www.instagram.com/photoshopdesire
Softwares Used:
----------------------------
Photoshop cc 2014, 2015, 2017
Photoshop cs5, cs6,
After Effects cs5
Camtasia Studio
Music:
------------
Open Highway (YouTube Library)


YORUMLAR